The Ultimate Guide to Effortlessly Set Up ACH Payments to Vendors – Vendor Payments Guide
Set up ACH payments to vendors: In today’s fast-paced business environment, efficiency is not just an advantage; it’s a necessity. The days of printing, signing, and mailing paper checks are rapidly being replaced by more streamlined, secure, and cost-effective methods. At the forefront of this evolution is the Automated Clearing House (ACH) network, a powerful system for electronic fund transfers. For any business managing relationships with multiple suppliers, freelancers, or service providers, the decision to set up ACH payments to vendors is a transformative step towards modernizing accounts payable.
This comprehensive guide will walk you through every aspect of this process. We will demystify the ACH network, explore its immense benefits, and provide a detailed, step-by-step roadmap for implementation. Whether you’re a small startup looking to establish efficient financial practices from day one or an established enterprise aiming to optimize your payment workflows, learning how to set up ACH payments to vendors will unlock significant operational and financial advantages. This article will equip you with the knowledge needed to make a smooth and successful transition.
Understanding ACH: The Backbone of Modern Business Payments

Before diving into the “how,” it’s crucial to understand the “what” and “why.” Grasping the fundamentals of the ACH network is the first step in your journey to set up ACH payments to vendors. This system is the invisible workhorse behind many of the financial transactions we take for granted, from direct deposit paychecks to automatic bill payments.
What Exactly is an ACH Payment?
An ACH payment is an electronic, bank-to-bank transfer of funds processed through the Automated Clearing House network in the United States. This network acts as a central clearing facility, batching transactions together and processing them at specific intervals throughout the day. It is governed by Nacha (formerly the National Automated Clearing House Association), which sets the rules and standards for all participants to ensure the system remains secure and reliable.
There are two primary types of ACH transactions:
- ACH Direct Deposit: This is a “push” transaction where a payer initiates the transfer to send money into a receiver’s account. This includes employee payroll, government benefits, and, most relevant to our topic, vendor payments. When you set up ACH payments to vendors, you are primarily using this method.
- ACH Direct Payment: This is a “pull” transaction where a payee is authorized to pull funds from a payer’s account. This is commonly used for recurring bills like gym memberships, utility payments, or mortgage payments.
For business-to-business (B2B) payments, the ACH Credit (Direct Deposit) is the standard. Your business initiates the payment, “pushing” the funds from your bank account directly into your vendor’s account, providing a clear and secure transfer of value.
Why Your Business Should Set Up ACH Payments to Vendors
The motivation to move away from traditional payment methods is compelling. The benefits extend far beyond simply eliminating paper checks; they impact your bottom line, operational efficiency, and even your professional relationships. The argument to set up ACH payments to vendors is built on several powerful advantages.
Unmatched Cost-Effectiveness
The cost of a single paper check can be surprisingly high when you factor in the check stock, printing, envelopes, postage, and the labor required for processing and reconciliation. Estimates range from $4 to $20 per check. In contrast, ACH transaction fees are a fraction of that cost, typically ranging from a few cents to a dollar. Compared to wire transfers, which can cost 25
50 per transaction, or credit card processing fees (often 2-3% of the transaction value), ACH is by far the most economical choice for regular B2B payments.
Superior Efficiency and Speed
Manually processing checks is a time-consuming bottleneck. ACH payments automate this entire workflow. Once a vendor is set up, paying them can be done with a few clicks. While standard ACH payments take 2-3 business days to settle, the introduction of Same-Day ACH provides an option for more urgent payments. This automation frees up your finance team to focus on more strategic tasks than stuffing envelopes. The efficiency gained when you set up ACH payments to vendors is a significant competitive advantage.
Enhanced Security
Paper checks are inherently insecure. They contain sensitive banking information and can be easily lost, stolen, or altered. The ACH network, governed by Nacha’s strict security protocols, is a far safer alternative. Electronic transfers reduce the risk of check fraud and mail theft. Furthermore, modern payment platforms add layers of security, such as encryption and multi-factor authentication, making the process to set up ACH payments to vendors and manage them incredibly secure.
Improved Vendor Relationships
Your vendors are the lifeblood of your business. Paying them on time, every time, is crucial for maintaining a strong, positive relationship. ACH payments are predictable and reliable. Vendors receive an electronic notification and the funds appear directly in their account, improving their cash flow and eliminating the uncertainty of waiting for a check to arrive in the mail and clear. This reliability is a key benefit when you set up ACH payments to vendors.
Simplified Record-Keeping and Reconciliation
ACH transactions create a clean, digital paper trail. Every payment is time-stamped and recorded, making bank reconciliation significantly easier. When integrated with accounting software, payments can automatically be matched to invoices, closing out open bills and reducing the risk of manual data entry errors. This streamlined record-keeping is a major reason why businesses choose to set up ACH payments to vendors.
Preparing to Set Up ACH Payments to Vendors: The Essential Checklist
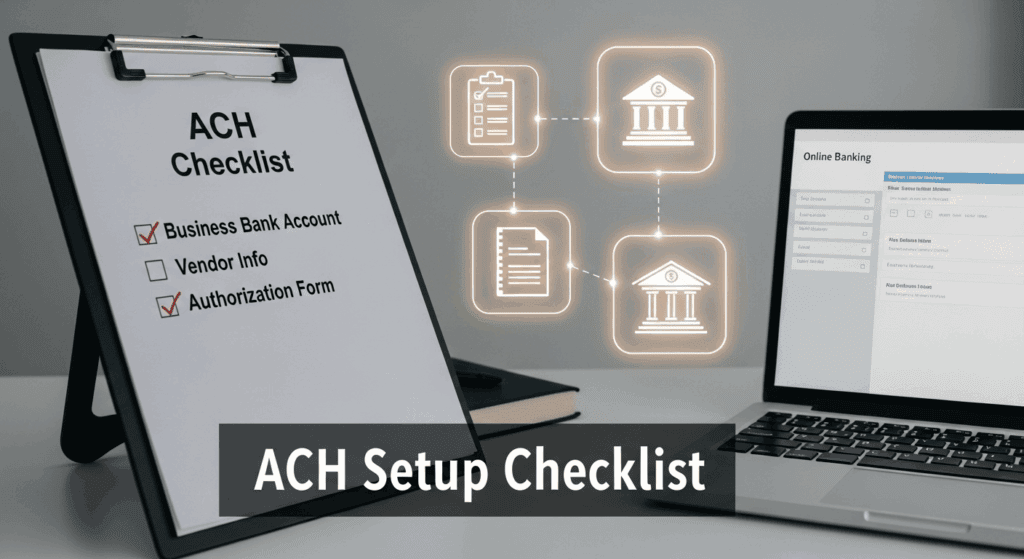
A successful transition to ACH requires careful preparation. Before you can begin sending electronic payments, you need to gather the right information and make a key decision about which processing method best suits your business. This preparatory phase is a critical part of how you set up ACH payments to vendors.
Gathering Necessary Information from Your Vendors
To pay a vendor via ACH, you need their specific banking details. It is paramount that you collect and store this sensitive information securely. Sending this data over an unencrypted email is a significant security risk.
The essential information you must collect from each vendor is:
- Vendor’s Legal Business Name
- Name of the Vendor’s Bank
- Bank’s ABA Routing Number (a nine-digit code identifying the financial institution)
- Vendor’s Bank Account Number
- The Account Type (typically Checking or Savings)
To formalize this process, you must obtain a signed Vendor ACH Authorization Form. This document serves as legal proof that your vendor has given you permission to send funds directly to their bank account. It protects both your business and your vendor. Many third-party payment platforms facilitate this process by providing a secure online portal where vendors can enter this information themselves, which is the most secure method.
Choosing Your ACH Processing Method
You have three primary avenues to set up ACH payments to vendors. The right choice depends on your business size, payment volume, technical resources, and desire for convenience.
- Directly Through Your Business Bank: Many commercial banks offer ACH origination services as part of their treasury or cash management solutions. This is a direct-to-the-source option.
- Third-Party Payment Processors: These are specialized online platforms (SaaS providers) built specifically for B2B payments and accounts payable automation.
- Integrated Accounting Software: Many popular accounting platforms like QuickBooks or Xero have built-in or add-on services that allow you to pay bills via ACH directly from the software.
Consider these factors when choosing: payment volume, budget for fees, need for features like approval workflows, and the importance of seamless accounting integration. A thoughtful decision here will make the entire experience to set up ACH payments to vendors much smoother.
Understanding the Associated Costs and Fees
While ACH is cost-effective, it is not always free. Understanding the potential fees associated with each method is crucial for budgeting and choosing the right partner.
Common fees include:
- Setup Fees: A one-time fee to establish your account, more common with direct bank services.
- Monthly Subscription Fees: A recurring fee for access to a third-party platform’s services.
- Per-Transaction Fees: A small, fixed fee for each ACH payment you send.
- Batch Fees: A fee for submitting a group of payments at once.
- Return or Reversal Fees: A penalty fee if a payment fails due to issues like incorrect account information or insufficient funds. This can be one of the more expensive fees, so accuracy is key.
Always request a full fee schedule from any provider you are considering. This transparency is vital before you commit to a method to set up ACH payments to vendors.
The Step-by-Step Guide: How to Set Up ACH Payments to Vendors
With your preparation complete, it’s time to execute. This section provides a detailed walkthrough of the three primary methods for setting up and initiating vendor payments via ACH. Following these steps will ensure a successful implementation.
Method 1: Setting Up ACH Payments Directly Through Your Business Bank
This traditional method involves working directly with your bank’s business services division. It is often favored by larger corporations with high transaction volumes and established banking relationships. For a smaller business, this process can sometimes be more cumbersome, but it is a viable path to set up ACH payments to vendors.
Step 1: Contact Your Bank’s Treasury or Business Services Department
Start by calling your business banking representative and inquiring about “ACH origination services.” They will guide you to the right department, often called Treasury Management or Cash Management. Be prepared to discuss your estimated monthly payment volume and the total dollar value of your transactions.
Step 2: Complete the Application and Underwriting Process
Banks view ACH origination as a form of credit extension because if a debit is reversed, the bank covers the initial loss. Therefore, they have a formal underwriting process. You will likely need to provide business financial statements, tax returns, and detailed information about your payment practices. This step can take several days or even weeks.
Step 3: Gain Access to the Bank’s Online Portal
Once approved, you will be granted access to a specific section of your online business banking portal dedicated to ACH services. These portals can sometimes be less intuitive than modern software, so be sure to request a walkthrough or training session from your bank representative.
Step 4: Add and Verify Vendor Bank Information
Within the portal, you will find a section to add “payees” or “recipients.” You will need to manually enter the vendor’s name, routing number, and account number that you collected on your authorization form. Some banks use micro-deposits (sending two small amounts) to verify the account before allowing a full payment.
Step 5: Initiate Your First ACH Payment
After a vendor’s account is verified, you can schedule a payment. You can typically initiate a single payment or create a “batch” file to pay multiple vendors at once. For your first few transactions, it is wise to start with a small, non-critical payment to ensure the process works as expected. This completes the direct bank process to set up ACH payments to vendors.
Method 2: Using a Third-Party ACH Payment Processor
This is an increasingly popular method, especially for small and medium-sized businesses (SMBs). These platforms are designed for usability and offer a suite of features beyond simple payment processing. Using a third-party service is often the easiest way to set up ACH payments to vendors.
Step 1: Research and Select a Provider
Numerous excellent providers specialize in B2B payments, such as Bill.com, Melio, and Veem. Compare them based on pricing, features (like international payments or approval workflows), and integration capabilities with your existing accounting software. Read reviews and choose a platform that fits your business needs.
Step 2: Create an Account and Complete Onboarding
The sign-up process for these platforms is typically fast and entirely online. You will provide basic information about your business. The verification and approval process is usually much quicker than a traditional bank, often taking less than a day.
Step 3: Link Your Business Bank Account
You will need to connect your business bank account, which will serve as the funding source for your vendor payments. This is usually done securely through a service like Plaid, where you log in with your online banking credentials to instantly link the account.
Step 4: Invite Vendors to Securely Input Their Information
This is a key advantage of third-party providers. Instead of manually collecting and entering sensitive bank data, you can invite your vendors via email to a secure, branded portal. The vendor enters their own banking information directly into the system, which significantly enhances security and reduces your liability.
Step 5: Schedule and Manage Vendor Payments
Once a vendor is set up, paying them is as simple as entering an invoice amount and a payment date. You can easily schedule future payments, set up recurring payments for regular expenses, and manage everything from a central dashboard. This modern approach to set up ACH payments to vendors simplifies accounts payable dramatically.
Method 3: Leveraging Your Accounting Software’s Built-in Features
For businesses that live inside their accounting software, this can be the most seamless option. It keeps all accounts payable activities within a single, familiar system, making reconciliation a breeze.
Step 1: Check if Your Current Software Offers ACH Services
Explore the features of your accounting platform (e.g., QuickBooks Online, Xero, Zoho Books). Look for options labeled “Bill Pay,” “Online Payments,” or something similar. These services may be included in your subscription or available as a paid add-on.
Step 2: Activate the Payment Service
If the feature is available, you will need to activate it. This might involve a simple application process within the software where you link and verify your business bank account, similar to the process with a third-party provider.
Step 3: Add Vendor Banking Details to Their Profile
Navigate to the vendor’s profile or contact card within your accounting software. There should now be a section to add their payment details, including their routing and account numbers. Ensure you have their signed authorization form on file before entering this information.
Step 4: Pay Bills Directly from the Software Interface
The workflow becomes incredibly efficient. When you enter a new bill from a vendor, you will see an option to “Schedule Payment” or “Pay Bill.” You can then select ACH as the payment method and choose a date for the funds to be sent. The software will automatically record the payment and mark the bill as paid, streamlining your entire bookkeeping process. This integrated method is an excellent way to set up ACH payments to vendors for ultimate efficiency.
Detailed Comparison of ACH Setup Methods
Choosing the right path to set up ACH payments to vendors depends on your unique business context. The table below provides a clear comparison of the three primary methods across several key factors to help you make an informed decision.
| Feature | Direct Bank | Third-Party Processor | Accounting Software |
| Setup Complexity | High; requires underwriting, paperwork. | Low; fast online signup and verification. | Low to Medium; simple activation within software. |
| Onboarding Time | Days to weeks. | Minutes to a few hours. | Typically less than one business day. |
| Per-Transaction Cost | Can be very low for high volume, but varies. | Often a low, flat fee per transaction. | Varies; may be included or a per-payment fee. |
| Monthly Fees | Often requires a monthly fee for the service. | Varies; some have free plans, others a monthly fee. | May be included in software subscription. |
| Vendor Onboarding | Manual entry of vendor data by your team. | Secure vendor self-onboarding portal. | Manual entry of vendor data by your team. |
| Integration/Reconciliation | Manual or requires complex file uploads. | Excellent; often offers two-way sync. | Perfect; it’s a native part of the system. |
| Security Responsibility | High; you are responsible for collecting/storing data. | Low; the provider handles secure data collection. | High; you are responsible for data entry. |
| Best For… | Large enterprises with high volume and IT support. | SMBs seeking ease of use, security, and features. | Businesses wanting the most integrated workflow. |
As the table illustrates, there is no single “best” method. Third-party processors offer a compelling balance of ease, security, and powerful features, making them an ideal starting point for most small and medium-sized businesses. However, if your entire financial life is already managed within a platform like QuickBooks, using its native bill pay service might be the most logical and efficient choice to set up ACH payments to vendors.
Best Practices for Managing Vendor ACH Payments Securely and Efficiently
Once you set up ACH payments to vendors, your work isn’t done. Adopting a set of best practices for managing these payments is essential to maximize security, maintain strong vendor relationships, and ensure long-term efficiency.
Implementing Robust Security Protocols
Electronic payments require strong digital security.
- Use Multi-Factor Authentication (MFA): Always enable MFA (also known as two-factor authentication) on your bank portal, payment platform, or accounting software. This adds a critical layer of security against unauthorized access.
- Establish Internal Controls: Implement a separation of duties. For example, the person who adds or edits vendor banking information should not be the same person who approves payments. This “four-eyes principle” helps prevent internal fraud.
- Regularly Audit Vendor Information: Periodically review your vendor list and their payment details to ensure they are accurate and current. Remove any inactive vendors to keep your system clean.
- Securely Handle Authorization Forms: Store your signed Vendor ACH Authorization Forms in a secure, access-controlled digital location. Never send sensitive banking information over standard email.
Communicating Clearly with Your Vendors
A smooth transition requires clear communication.
- Announce the Change: Proactively inform your vendors that you are transitioning to ACH payments. Frame it as a positive change that will result in them being paid faster and more reliably.
- Provide Clear Instructions: Whether you are sending them an authorization form to fill out or an invitation to an online portal, make the instructions simple and clear. Offer assistance if they have questions.
- Send Remittance Advice: Configure your system to automatically send an email notification (remittance advice) to your vendor whenever a payment is initiated. This email should include details like the invoice numbers being paid and the total amount, which helps their own accounting.
Automating and Streamlining Your Accounts Payable Workflow
The true power of electronic payments is realized through automation.
- Set Up Recurring Payments: For vendors you pay a fixed amount each month, like for rent or software subscriptions, set up recurring ACH payments. This “set it and forget it” approach saves time and ensures on-time payments.
- Use Approval Workflows: If you have a team, use the approval workflow features common in third-party platforms. This allows you to set rules, such as requiring a manager’s approval for any payment over a certain amount, adding financial control.
- Leverage Software Integration: If you’re using a third-party platform, ensure its sync with your accounting software is active. This will automatically record payments, close out bills, and drastically reduce manual bookkeeping tasks. Making this a priority after you set up ACH payments to vendors will save countless hours.
Common Challenges and How to Overcome Them When You Set Up ACH Payments to Vendors
While the process is generally smooth, you may encounter a few common hurdles. Being prepared for them will ensure they are minor bumps in the road rather than major obstacles. The path to set up ACH payments to vendors is easier when you anticipate these challenges.
Dealing with Payment Failures and Returns
Occasionally, an ACH payment may fail or be “returned.” The ACH network uses specific return codes to explain the reason. Common codes include:
- R01 – Insufficient Funds: Your business account did not have enough funds to cover the payment.
- R03 – No Account/Unable to Locate Account: The vendor’s bank information is incorrect.
- R29 – Corporate Customer Advises Not Authorized: The vendor’s bank has blocked the transaction.
When a payment is returned, your payment provider will notify you. The best course of action is to immediately contact the vendor, explain the situation, reverify their banking information with them, and correct it in your system before re-initiating the payment.
Managing Vendor Hesitancy or Resistance
Some vendors, particularly smaller businesses or sole proprietors, may be hesitant to provide their bank account details. They might be accustomed to receiving checks or have concerns about security.
To overcome this, you can:
- Reassure Them on Security: Explain the security measures your chosen platform has in place, such as bank-level encryption. Highlight that a secure online portal is much safer than mailing a paper check.
- Emphasize the Benefits for Them: Remind them that they will receive their money faster and more predictably, with no need to make a trip to the bank.
- Provide a Professional Experience: Using a dedicated third-party platform with a professional-looking self-onboarding portal can build trust and make vendors more comfortable than simply asking for details in an email.
Navigating ACH Processing Times and Cutoffs
It is critical to remember that ACH is not an instant payment method like a wire transfer.
- Understand Processing Times: Standard ACH credit transfers typically take 2-3 business days to settle in the recipient’s account. Plan your payments accordingly to ensure your vendors are paid by their due date.
- Know Your Cutoff Times: Every payment processor has a daily cutoff time (e.g., 4 PM ET). If you initiate a payment after this time, it will not begin processing until the next business day.
- Use Same-Day ACH Sparingly: While Same-Day ACH is an option for urgent payments, it usually comes with a higher fee. It’s a useful tool to have but should be reserved for when it’s truly necessary. A clear understanding of timelines is part of a successful plan to set up ACH payments to vendors.
Conclusion: Embrace the Future of Business Payments
The decision to set up ACH payments to vendors is more than just a minor operational tweak; it is a strategic move that positions your business for greater efficiency, security, and scalability. By replacing outdated, manual check-writing processes with a streamlined electronic system, you reclaim valuable time, reduce operational costs, and strengthen your relationships with crucial partners.
The journey may seem daunting at first, but as this guide has shown, the process is straightforward and manageable. Whether you choose to work through your bank, a dedicated third-party platform, or your existing accounting software, the long-term benefits are undeniable. By making the commitment to set up ACH payments to vendors, you are not just improving your accounts payable process—you are building a more resilient, modern, and professional financial foundation for your company’s future.
Also Read: Essential Accounts Payable Best Practices Small Business Should Follow
Frequently Asked Questions (FAQ)
1. How long does it take to set up ACH payments to vendors?
The setup time varies significantly by method. Setting up through a third-party payment processor or integrated accounting software is typically very fast, often taking less than a business day to get your account verified and ready. The process to set up ACH payments to vendors directly through a bank is more involved and can take several days to a few weeks due to their underwriting and application process.
2. Are ACH payments secure for paying vendors?
Yes, ACH payments are highly secure. The network is governed by the strict rules and security protocols of Nacha. Electronic transfers eliminate the risks associated with paper checks, such as mail theft and check fraud. For maximum security, use a reputable payment platform that offers features like data encryption and secure portals for vendors to enter their own information, reducing your liability.
3. What is the typical cost associated with ACH vendor payments?
Costs can vary, but ACH is one of the most cost-effective payment methods. Fees are typically much lower than for wire transfers or credit cards. You may encounter a small per-transaction fee (often $0.25 to $1.50), a monthly platform fee, or a combination of both. Some modern payment platforms offer free ACH-to-ACH transfers, making them an extremely affordable option.
4. What information do I need from my vendors to set up ACH payments?
To set up ACH payments to vendors, you must collect the following information: the vendor’s legal business name, their bank’s name, their bank’s 9-digit ABA routing number, their bank account number, and the account type (checking or savings). It is a best practice and a legal requirement to obtain a signed ACH Authorization Form from the vendor before initiating any payments.
5. Can I set up recurring ACH payments to vendors?
Absolutely. One of the major advantages of using an ACH payment system, especially through a third-party provider or accounting software, is the ability to automate payments. You can easily set up recurring payments for fixed monthly expenses like rent, software subscriptions, or professional retainers. This “set it and forget it” feature saves time and ensures your vendors are always paid on schedule.